 I used Amber's "Someone To Love" kit, and a template from Crystal Wilkerson. Hopefully I can still get in on the challenge even though I can't get this posted in the gallery! And if you want to enter, hop over to Amber's blog to check it out :)
Tuesday, June 30, 2009
Stolen Moments Challenge
 I used Amber's "Someone To Love" kit, and a template from Crystal Wilkerson. Hopefully I can still get in on the challenge even though I can't get this posted in the gallery! And if you want to enter, hop over to Amber's blog to check it out :)
Friday, June 26, 2009
Crafty Bug
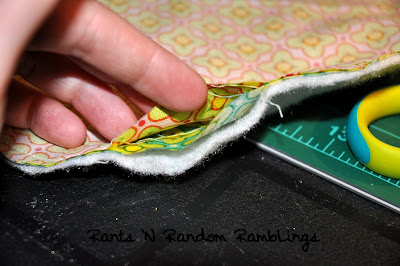
 I put them right sides together with the batting on the bottom, trimmed the corners for my flap with my triangle thingy (I'm all about proper terminology), then sewed around leaving an opening for turning.

I did some loop-de-loos and even tried to make a couple hearts.

Anyways, then I added a couple pieces of velcro to one end where the flap will close over.


Monday, June 15, 2009
Wednesday, June 10, 2009
Twilight and Coffee
 I also found this little cartoon on this site which I thought was hilarious, if you want to sum up the saga in 4 comic strips.
566295.html.jpg)

Fabric Flowers
 Not bad I thought, mostly white, and the little bit in front isn't so boyish that she couldn't wear it. But then she had it on, and I told my husband I was going to girl it up a little bit. And then I remembered this tutorial I had found a little while ago on how to do these fabulous fabric flowers. I had originally found them here on Rachel's blog (you can find the link to her etsy store on her sidebar) but as per usual I am too cheap and crafty to buy something like this when I think there is a chance I can make it myself!! The tutorial has a printable template you can use to cut out the flowers. I used farmers market material, which I bought here, as I just love the colors and they match a lot of what Rayna wears, and I thought it would look nice on the hat.
  So I think it turned out pretty cute! I altered mine the slightest bit from the tutorial in that she tells you to cut 2 large flowers, and 4 smaller flowers. Well, I did that, and then I cut my template for the smaller flower down about 1/4" all around and cut out 4 more flowers, so I have a total of 3 layers instead of 2. (It makes sense once you read the tutorial). I also tacked the pieces together and then used a regular button and sewed the whole thing right to the hat. (I see alot of the flowers with fabric covered buttons or blingy buttons instead.) Here is a closer up shot of my crafty awesomeness. I'd say it's almost Rocktastic, right Des?? hehe. Wow, I'm all about the links today.
 And then since my model was having a good old snooze, my back up agreed to model it for me
 Then my model woke up and decided to grace us with her awake-ness. Models. They're so moody.
  So that's what I have for you today, I also got some digital scrapbooking layouts done, maybe I'll post those later in the week. Chase also had his fourth(!) birthday at the end of May and I decorated a cake for it, so I have some catch-up pictures and updates to do as well. Hope you enjoy making your flowers, I know I did, and I want to make more! The thought of making different sizes and embellishing everything from crocheted toques and tote bags to headbands and all the different fabrics I could use....oh my head is just swimming! Have a great day!


